FREE-BODY DIAGRAMS
Application of Newton's Laws
CP-04
Page 6
Rev. 0
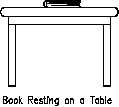
Figure 1 Book on a Table
Constructing a Free-Body Diagram
In constructing a free-body diagram the following steps are usually followed.
Step 1.
Determine which body or combination of bodies is to be isolated. The body
chosen will usually involve one or more of the desired unknown quantities.
Step 2.
Next, isolate the body or combination of bodies chosen with a diagram that
represents its complete external boundaries.
Step 3.
Represent all forces that act on the isolated body as applied by the removed
contacting and attracting bodies in their proper positions in the diagram of the
isolated body. Do not show the forces that the object exerts on anything else,
since these forces do not affect the object itself.
Step 4.
Indicate the choice of coordinate axes directly on the diagram. Pertinent
dimensions may also be represented for convenience. Note, however, that the
free-body diagram serves the purpose of focusing accurate attention on the
action of the external forces; therefore, the diagram should not be cluttered
with excessive information. Force arrows should be clearly distinguished from
other arrows to avoid confusion. For this purpose colored pencils may be
used.


